How to use Sandhi

From download to your first task.

Eight steps, about fifteen minutes, and nothing to pay. The longest part is choosing which AI model does the thinking — so that section covers both the free cloud route and the fully-local one, in detail.

Part 1

Set up on the desktop — the brain

Everything starts here. The desktop app does the thinking, holds the encryption keys and talks to the AI model. Until it is running and configured, the mobile app has nothing to connect to.

Step 1

Install on your computer

Your computer is the brain. It does the thinking, holds the encryption keys, and talks to whichever AI model you choose. Your phone is the eyes and hands. Nothing works until the brain is running, so start here.

Grab the installer from the download page and run it. There is no account to create and nothing to sign into.

Windows may warn you that the publisher is unrecognised. That is code-signing, not malware — click More info → Run anyway. Signed builds are coming.
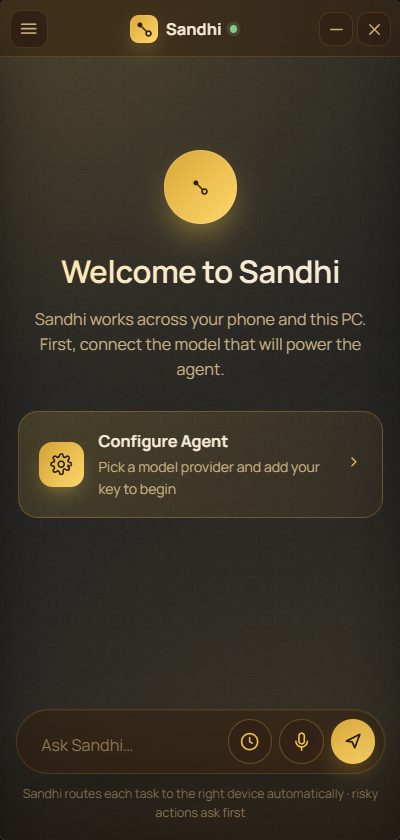
Sandhi on first launch, showing Welcome to Sandhi and a Configure Agent button
First launch, nothing configured yet.

Step 2

Set a pairing password

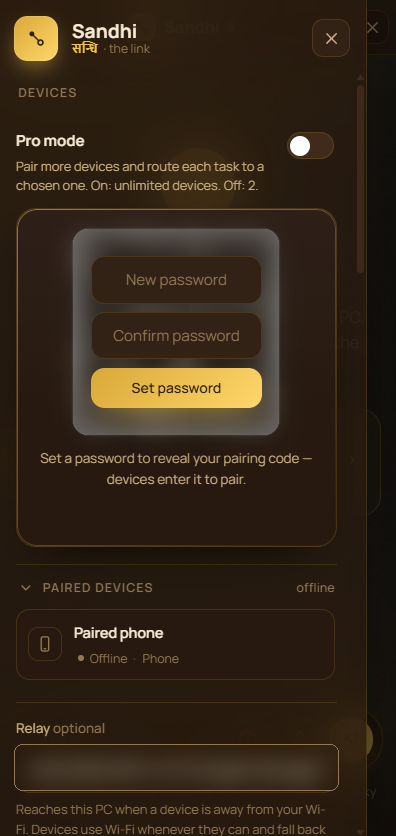
Open Sandhi and click the ☰ menu → Devices. The pairing code is blurred until you set a password. Choose one and it clears.

This password is what stops a stray photograph of your screen from letting somebody pair their phone with your computer. You will type it once more on the phone, and then not again — devices remember each other.

The code re-locks every 15 minutes. Enter the password again to reveal it. You can change or revoke it any time from the same panel; revoking disconnects every paired device until they pair again.
The Sandhi Devices panel on first run, with the pairing code blurred behind a Set a password form
First run: the code stays blurred until you set a password.

Step 3

Give it a brain

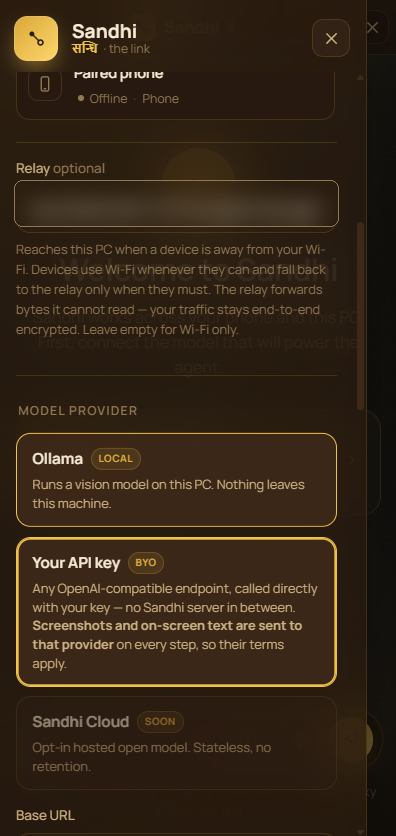
Sandhi does not ship a model. You choose one, and that choice decides where your screenshots go. Two good free routes — pick either.

The Model provider panel in Sandhi offering Ollama, your own API key, or Sandhi Cloud
Where you choose: ☰ → Model provider.
Recommended to start

Google AI Studio

Free tier · fast · works on any computer

The quickest way to a working agent, and it runs well on modest hardware because the thinking happens on Google's machines. The trade: each step sends a screenshot to Google under your own API key.

  1. Go to aistudio.google.com/app/apikey and sign in.
  2. Click Create API key, and choose a project with no billing enabled.
  3. Copy the key. It must start with AIzaSy.
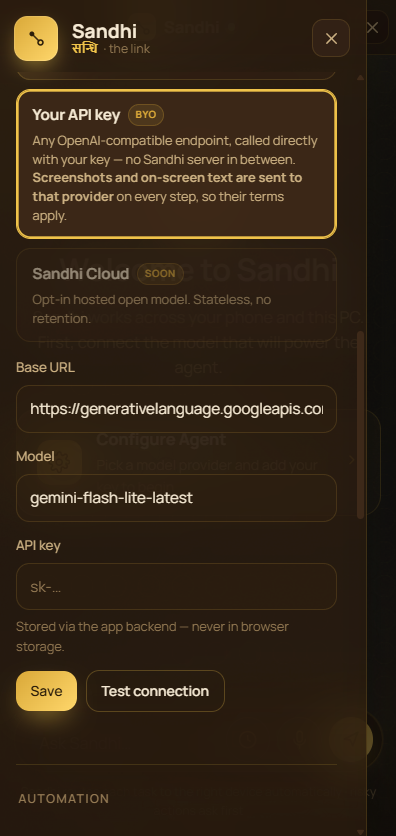
  4. In Sandhi: ☰ → Model provider → Your API key.
  5. Fill in the three fields exactly:
    Base URLhttps://generativelanguage.googleapis.com/v1beta/openai
    Modelgemini-flash-lite-latest
    API keyAIzaSy…
  6. Click Test connection, then Save.
The Sandhi provider fields with the base URL and model prefilled and the API key box empty
Paste your key here, then Test connection.
Three traps that waste an afternoon
  • Google now hands out keys beginning AQ.Ab8… by default. Those are rejected here. Keep creating until you get an AIzaSy… one.
  • gemini-2.0-flash and gemini-2.5-flash often report not available on new accounts. gemini-flash-lite-latest is the one with live free quota (30 requests/minute) — plenty for one agent.
  • Turning on billing deletes the free tier for that project. If you want free, keep the project billing-free.
Nothing leaves your machine

Ollama (fully local)

Free · private · needs a decent GPU

The model runs on your own computer, so no screenshot ever leaves it. This is the strongest privacy position Sandhi can be in — if your hardware can carry it.

  1. Install Ollama and let it start.
  2. Pull a vision model (it must see screens — text-only models cannot drive a phone):
    ollama pull qwen2.5vl:7b
  3. In Sandhi: ☰ → Model provider → Ollama.
  4. Leave the URL as http://localhost:11434, set the model name to match what you pulled, then Test connection and Save.
ModelVRAMVerdict
qwen2.5vl:3b~4 GBLightest that works. Misreads small UI text.
qwen2.5vl:7b~8 GBBest balance. Start here if you can.
llama3.2-vision:11b~12 GBStrong, slower per step.
minicpm-v~6 GBGood on small screens, weaker at planning.
Be realistic about hardware. Vision models are heavy. On a CPU-only laptop with 8 GB RAM, expect roughly a minute per step and frequent out-of-memory crashes — a task that takes 40 steps becomes unusable. Local is worth it with a dedicated GPU of 8 GB or more; otherwise start with the cloud route above and switch later.

Either way, the model only ever sees what a step needs — the current screen and the text on it. Sandhi runs no server of its own in between, and the key you paste is stored in your operating system's credential manager, never in a file we can read.

Part 2

Set up on mobile — eyes and hands

With the brain running, the mobile app takes about five minutes: install, scan, grant the permissions Android insists you grant yourself, and ask for something.

Step 4

Install on your phone

Two ways, whichever suits: download the APK from the download page, or — easier — click Get the app on the desktop's Devices panel and scan the QR that appears straight onto your phone.

Android will ask you to allow installing from this source. That is normal for software delivered outside the Play Store.

Why not the Play Store? Sandhi uses Android's accessibility service to operate apps for you. Google restricts that to apps whose purpose is accessibility, so distributing here keeps the feature intact rather than crippled.
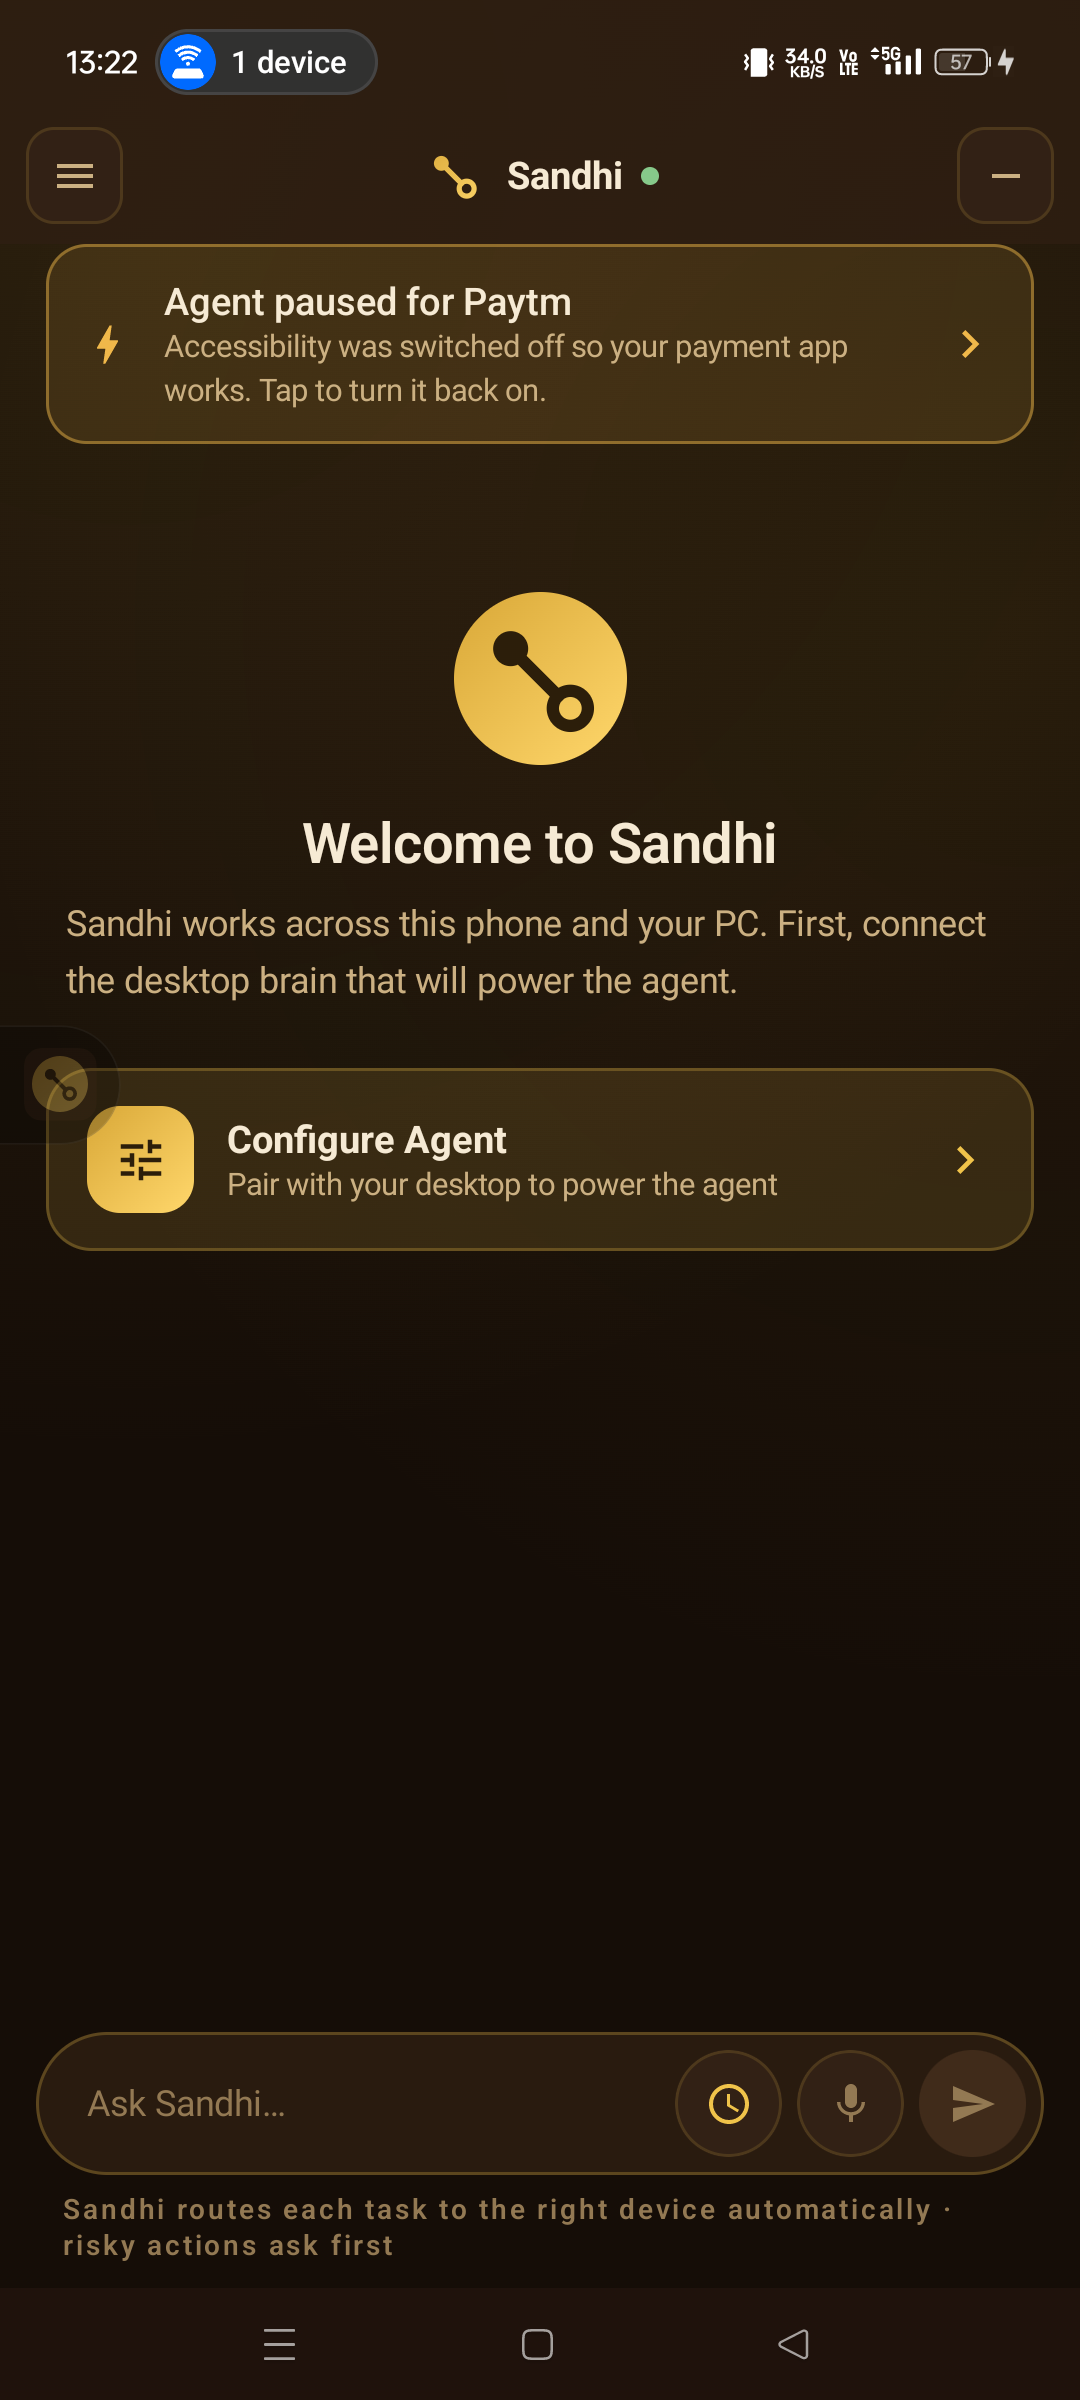
The Sandhi app on Android, showing the welcome screen with a Configure Agent button
The app on first launch — a real screenshot.

Step 5

Pair the two

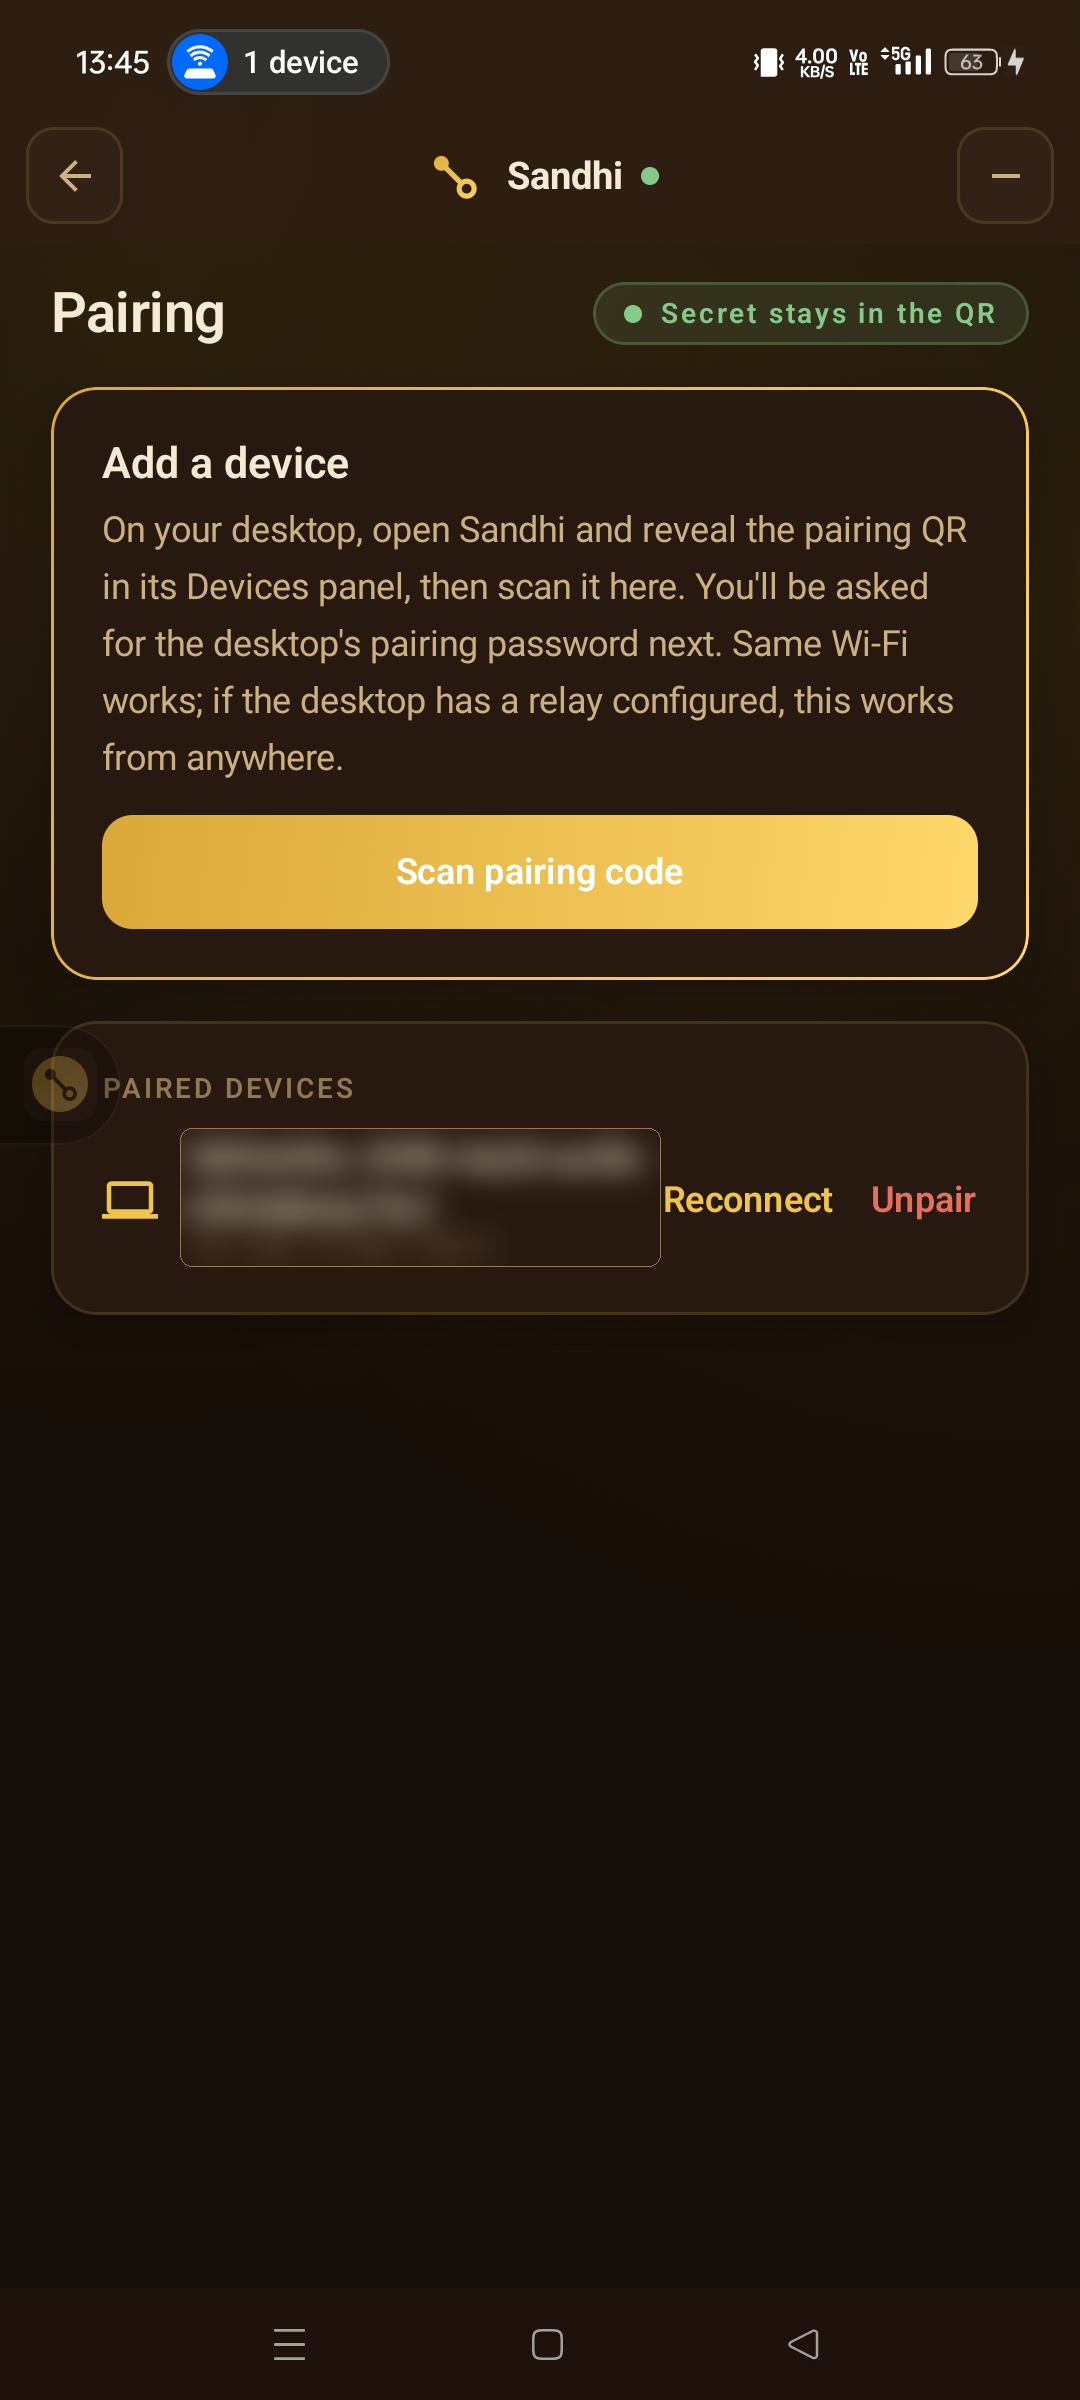
On your phone or tablet tap Configure Agent → Scan pairing code, point it at the code on your computer, then type the password you just set. That is the whole pairing.

Behind that one scan, the two devices run a key exchange and memorise each other's identity. From then on they reconnect on their own — no password, no account, no server in the middle.

You will know it worked: the dot beside "Sandhi" at the top of the mobile app turns green, and the computer lists that device under Paired devices.
The Pairing screen on Android with a Scan pairing code button and the paired desktop listed
After pairing — the desktop appears under Paired devices. Its identifiers are blurred here.

Step 6

Grant the permissions

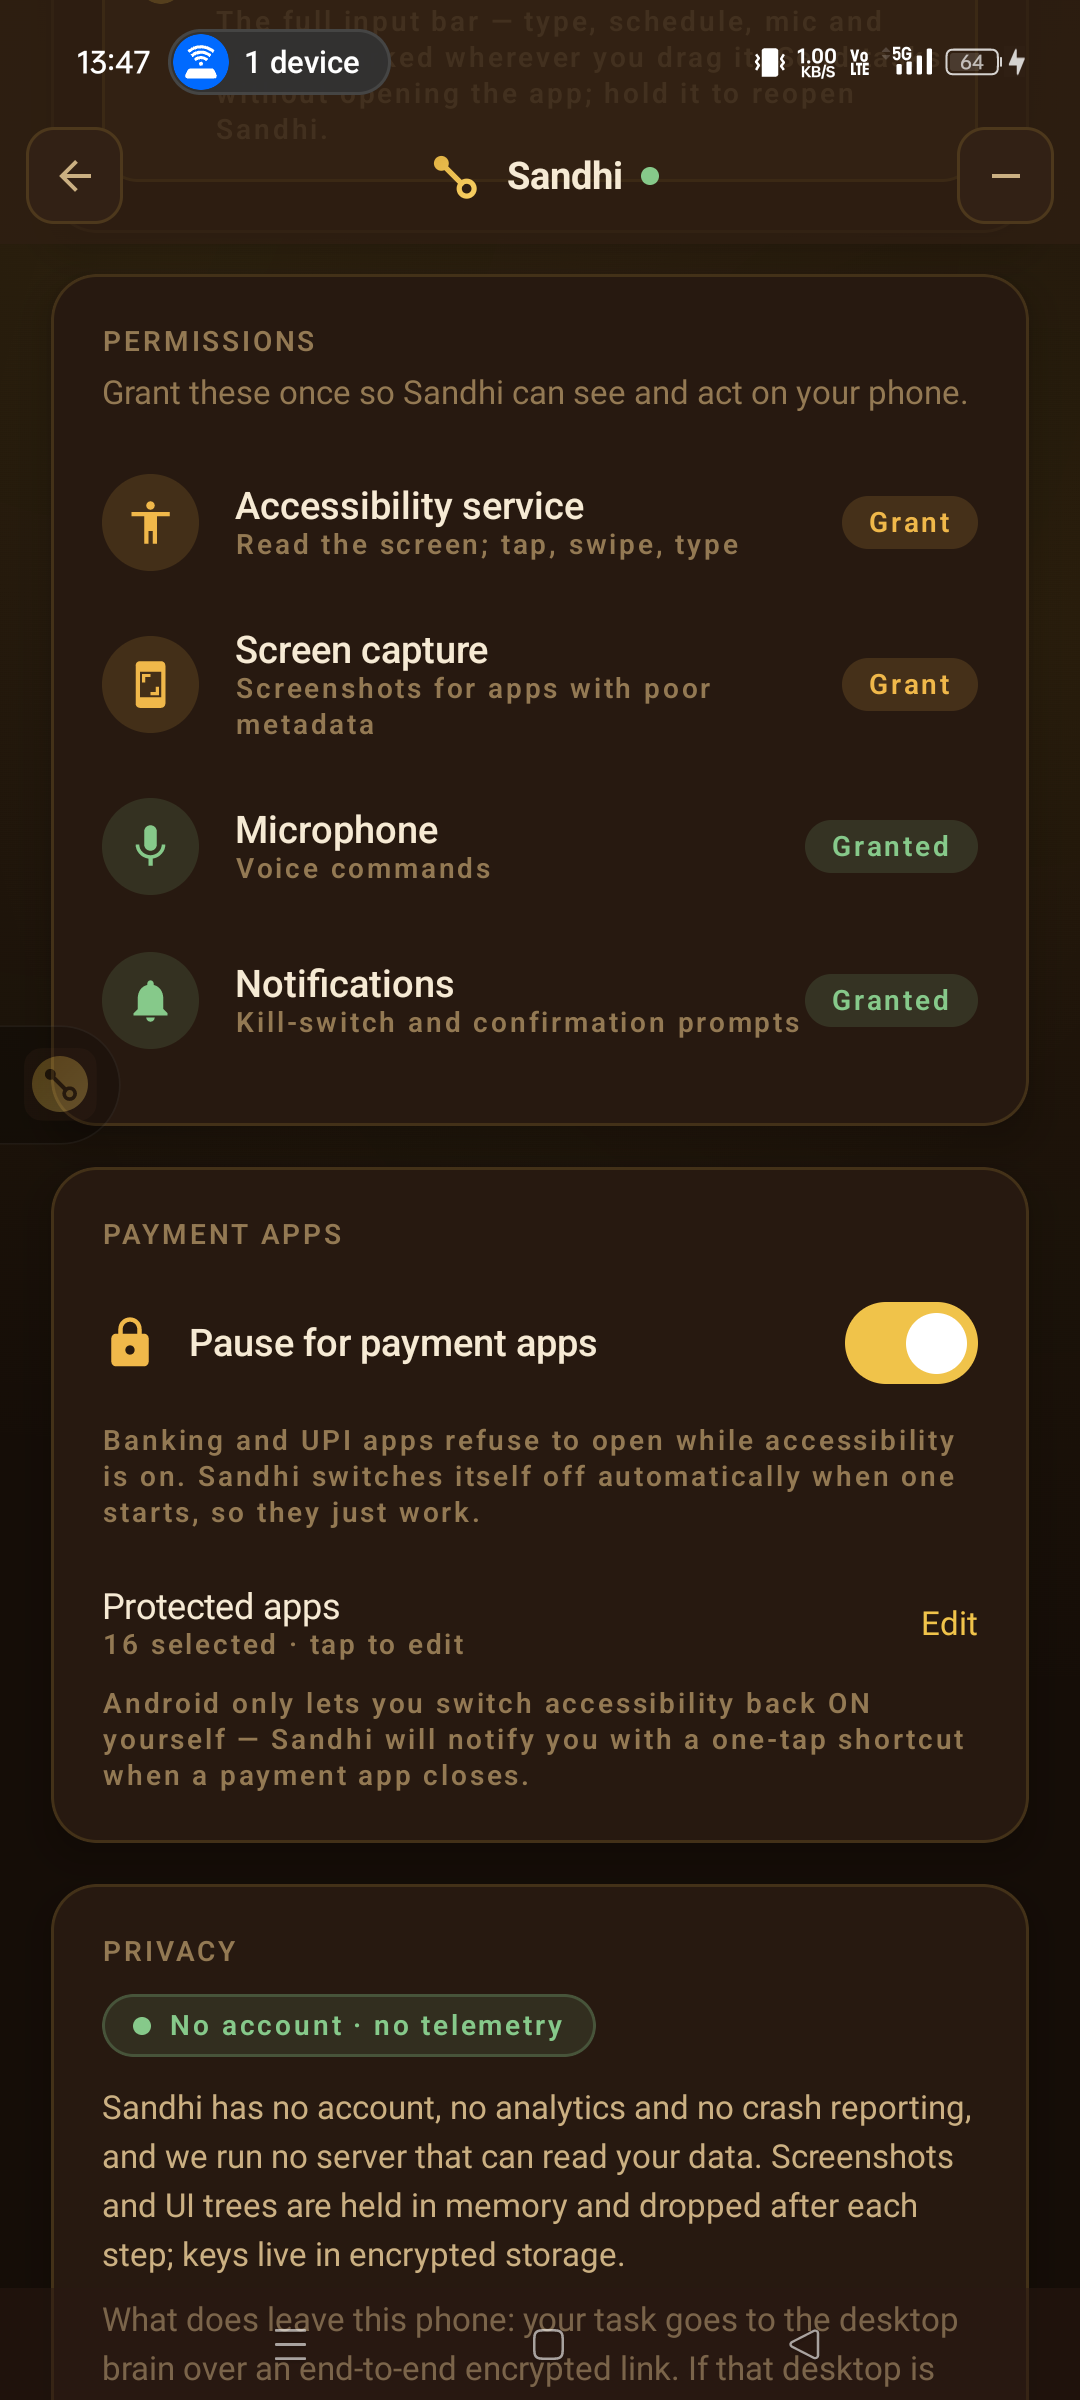
On the mobile device, open ☰ → Settings → Permissions. Android deliberately makes these manual — no app can grant them to itself, and that is a good thing. Two are essential; two are conveniences.

  • Accessibility service requiredReads the screen and taps, swipes and types. This is the one that makes the agent work at all.
  • Screen capture requiredLets the vision model see the screen, which is how it knows where it is. Needed for apps whose layout the accessibility tree describes poorly.
  • Microphone optionalOnly for voice commands, and only while you hold the button.
  • Notifications optionalThe kill-switch and confirmation prompts. Worth having.
On Xiaomi, Oppo, OnePlus, Vivo and Realme these live behind extra confirmation screens, and some models forget them after a reboot. If the agent suddenly stops responding, check here first.
Banking apps are handled for you. Banking and UPI apps refuse to open while any accessibility service is running, so Sandhi switches itself off when one starts — sixteen apps are protected by default, and you can edit the list. Android only lets you switch accessibility back on, so Sandhi puts a one-tap shortcut in your notifications when the payment app closes.
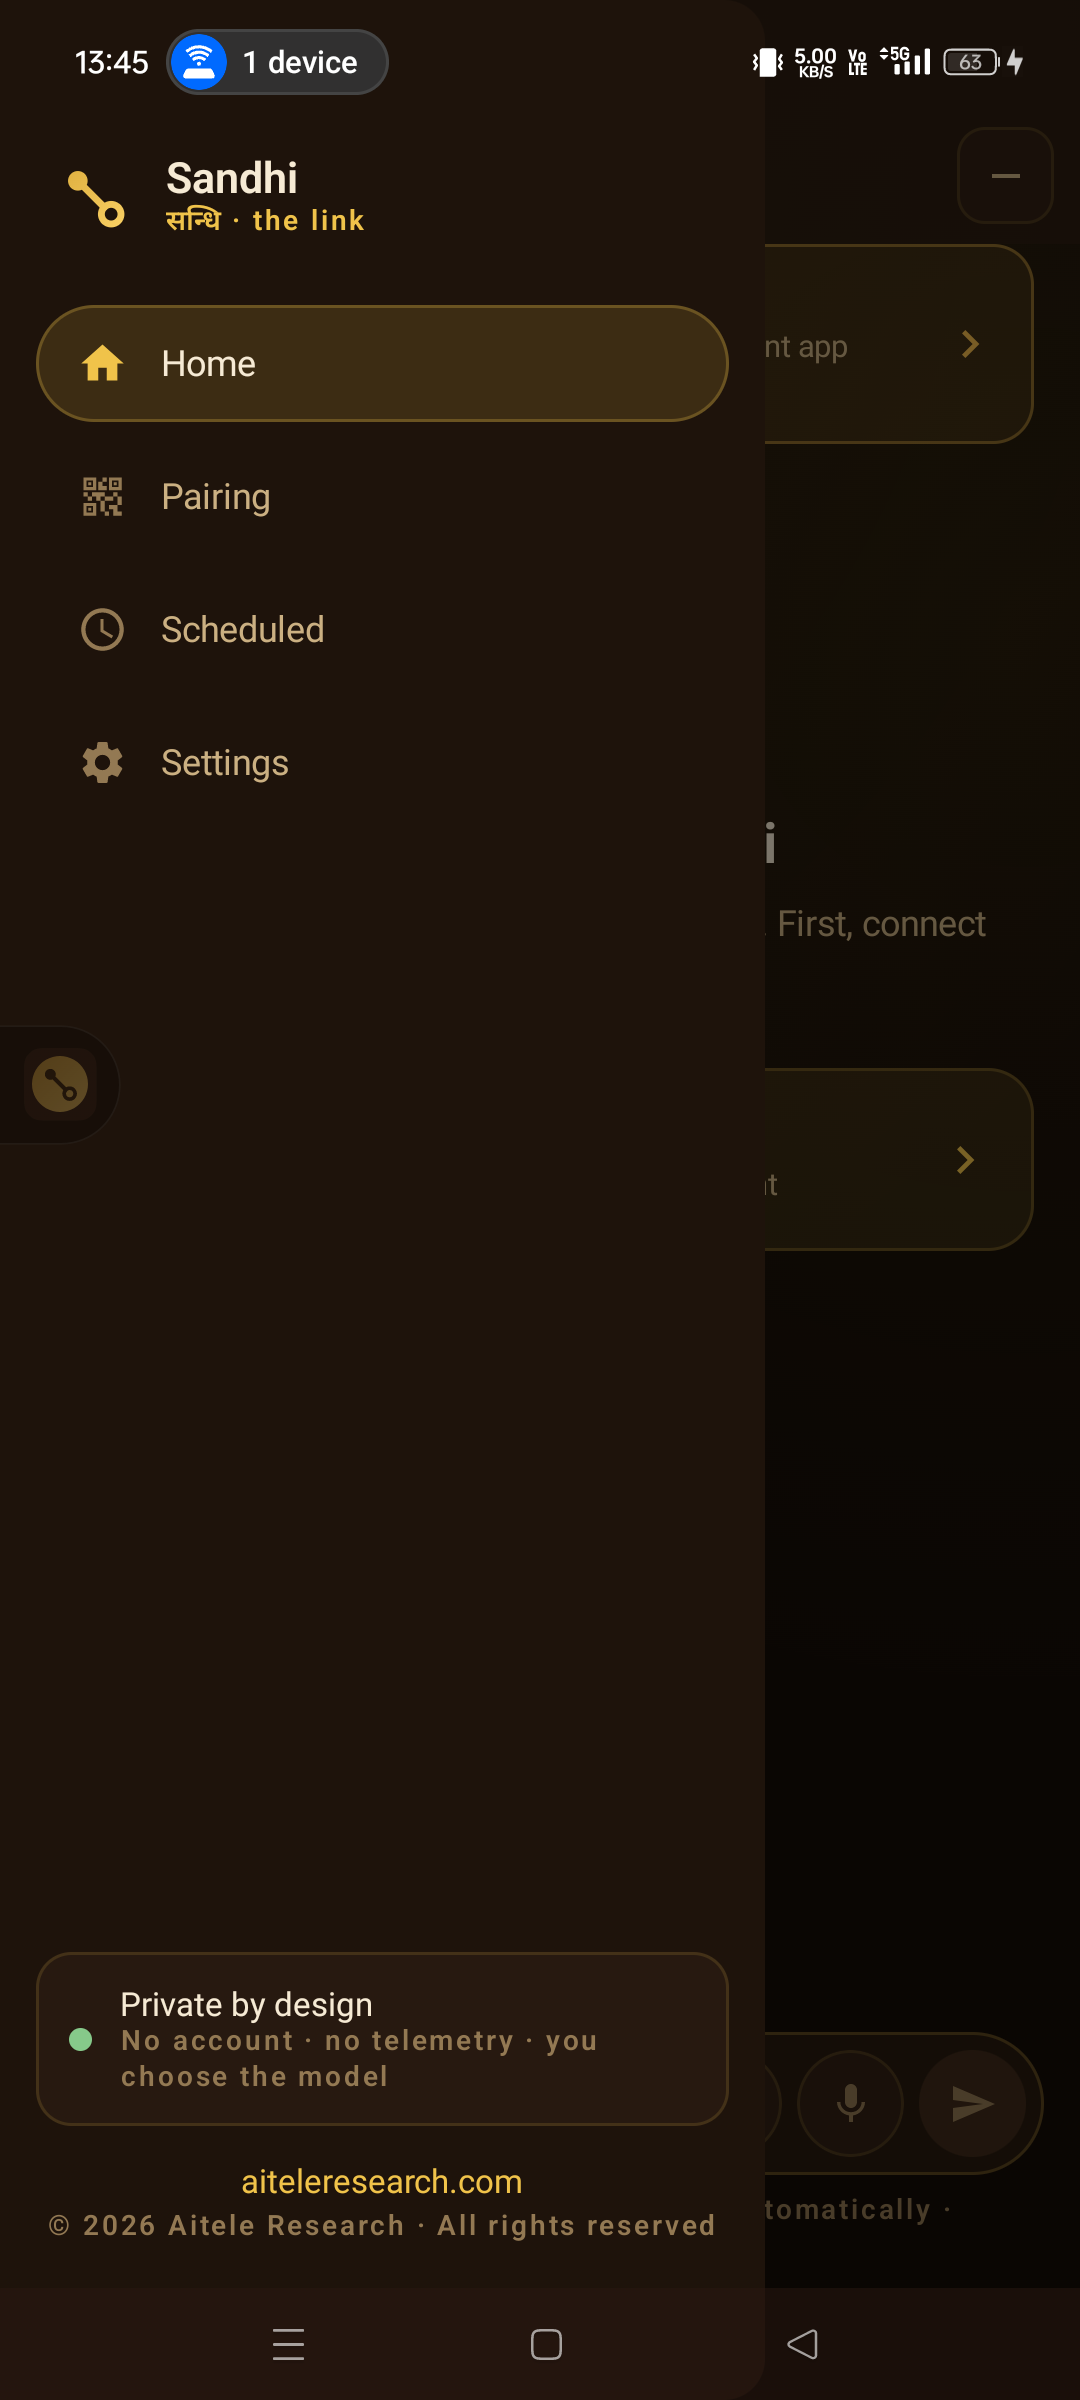
The Sandhi menu on Android with Home, Pairing, Scheduled and Settings The Permissions card showing Accessibility, Screen capture, Microphone and Notifications
Menu → Settings → Permissions. Both real screenshots.

Step 7

Run your first task

Type it the way you would say it to a person. Sandhi works out which device the task belongs to on its own — you only name a device when you want to override that.

Good first tasks, because they are easy to verify and harmless if they go wrong:

  • “Set an alarm for 7 AM tomorrow.”
  • “Open WhatsApp and read my unread messages.”
  • “What's on my calendar today?”

You will see it work: each step appears as it happens, with what it looked at and what it did. Press Stop whenever you like.

It asks before anything irreversible — sending, paying, deleting, installing. Passwords, OTPs and card fields are always refused, and no setting changes that.

Next

Going further

Use it away from home

By default your devices talk directly over your Wi-Fi. To reach your computer from mobile data, host the small relay that ships in the relay/ folder and paste its address into ☰ → Devices → Relay. It forwards encrypted bytes it cannot read.

Schedule things

Tap the clock in the prompt bar, or just say when: “every morning at 7, read me my unread messages.” Sandhi recognises the timing and offers to schedule it.

Add more devices

Free covers two. For more, activate a licence under ☰ → Plan and turn on Pro mode. See pricing.

Ready?